Do you know what PostgreSQL is? PostgreSQL is a relational database management system developed open source. PostgreSQL can run on the Linux platform and has the function of objects that become relational components in a database management system.
The various features that really stand out from this PostgreSQL are that we can rely on this database and its potential is very strong, the cost of maintenance is also cheaper and can be attempted manually and the process of collecting data is also very easy.
This database is managed and developed by the PostgreSQL Global Development Group, where the group is the developer of this PostgreSQL. In this article, we will explain how to easily install PostgreSQL on Windows 10.
How to Install Postgresql on Windows 10
To use PostgreSQL is very easy, you can download it for free through the official page. Therefore, you don't need to buy a license or learn with the demo version when you want to use this PostgreSQL tool. All users can get the whole program without any cost.
One of the features that we can use optimally from PostgreSQL is the Replication feature. We can use these features without any cost or without buying a license.
The internal tooling contained in this tool is also very strong and PostgreSQL also has built-in features that can support all external tools needed by a DBA to make a system that is there run effectively and efficiently.
If you are interested in using PostgreSQL in developing your system, then you should install it first. Here's how to install PostgreSQL on Windows 10.
- Previously you had to download the application from PostgreSQL through the official website. Click Here to download the PostgreSQL application. Once downloaded, double-click on the PostgreSQL application installer.
- Then the Setup window will appear as shown in the picture. Click the Next button to continue configuring PostgreSQL.
- In the next step you will be asked to place the directory where your PostgreSQL will be installed. Here you can just click the Next button because the directory address has been given automatically.
- Then check all the components in the component box section. And then click the Next button.
- Click the Next button.
- Provide a password for your database superuser. Then click the Next button.
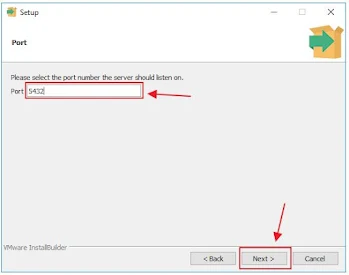
- Enter your server port number. Usually here it is filled in automatically, so you only need to click the Next button.
- In the Advanced options process, select a locale with the [Default locale] option. Then click the Next button.
- Well, here you can re-check the configuration that you have done before. If it is appropriate, then click the Next button.
- Then the next step you can install the PostgreSQL application. Click the Next button to install.
- Wait until the installation process is complete.
- When the installation process is complete, then click the Finish button.
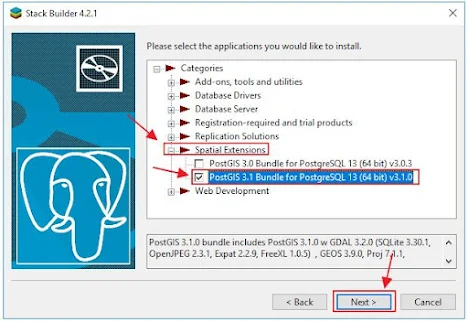
- The Stack Builder window will appear. The next step is that you can choose the PostgreSQL version with the port you are using. Then click the Next button. You need to know, to do this step you must be connected to the internet network.
- Then the download process will begin. Wait for the download process to complete.
- Then click the Spatial Extensions menu, and in the menu click one of the PostGIS versions that you want to use. Click the Next button.
- Then click the Next button.
- Then the process of downloading the Bundle package for PostgreSQL will run.
- Now if you are finished, then click the Next button.
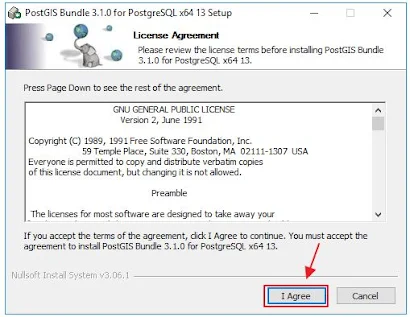
- The Setup window for the PostgreSQL bundle will appear, click the I Agree button.
- And now, you can use PostgreSQL to expand your system.
That's the article that explains how to install PostgreSQL on Windows 10. Hopefully this article can be useful for you.


