Dropbox is a cloud-based data storage service or cloud. Dropbox is operated by a Californian company. This cloud-based storage service can synchronize files or folders that you own. This service has the same features as any other cloud storage service.
The Dropbox service was founded in 2007 by two MIT students, Drew Houston and Arash Ferdowsi. Dropbox provides 2 versions, namely a free version and a paid version. In the free version, you will get a storage quota of 2 GB, if you want to use more then you have to subscribe to premium.
How to Use Dropbox for Beginners
For those of you who want to use Dropbox for the first time, you may be a little confused even though the interface is very easy to understand. Here are some steps and features that you can get in this Dropbox.
1. Register a Dropbox Account
- First, please open the Dropbox website or click This Link. Or you can also directly download the Windows version of the Dropbox application.
- Then, in the Sign Up section, please enter your personal data. Or you can simply click Sign Up with Google.
- Then, please select which Google account you want to use.
- Then, click Allow to allow Dropbox to see your gmail contacts.
- Then, click or check the I agree to the Dropbox terms section. Then, click Sign Up.
- Then for the sake of security, Dropbox wants to verify that it is you. Just click Verify and follow the next steps.
- Done. Your Dropbox account creation is complete.
- Then, after your account is done. You can choose to use free premium access for a whole month or directly use a Basic account with a storage capacity of 2 GB. Choose according to your wishes. As in the image below.
2. Uploading Files or Folders
- First, please open the Dropbox Application.
- Then, please specify whether you want to upload files or folders. Choose the one to your liking.
- Then, please select the file or folder you want to upload. Click Open.
- Then, click Upload.
- Wait a few moments until the upload process is complete.
- If the process is complete, please click Done.
- Done. You can already see your files or folders on the home page.
3. Share or Transfer Files or Folders
- First, please specify which files or folders you want to share or transfer.
- Then, please click Share.
- Then, please enter the email address you want to provide the file or folder to in the box provided.
- You can also choose permissions for those who have the link or that you share via email, whether they can only view it or they can also edit it.
- You can also edit access permissions via the Settings button.
- You can edit access rights, cancel file transfers, provide passwords, and so on.
- If you are ready to send the file or folder, please click Share File. As in the image below. Or if you just want to share the link, you can click the Copy Link button.
- Done.
4. Request or Request File
- First, please return to Home.
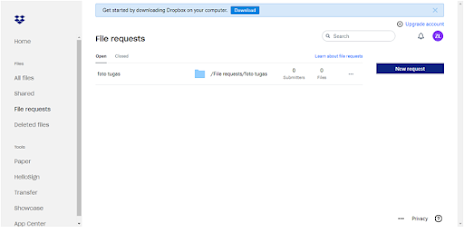
- Then, please click File Requests in the left menu.
- Then, please click New Request which is on your right.
- Then, a new window will appear. Please enter the Title, Description, and Folder to upload the file.
- Then, you can also change the folder name to your liking by clicking Change Folder. When finished, click Create.
- Just like sharing files, you must also enter an email address or copy a link to allow file transfer. Please enter your email address in the field provided and you can also add a message for the recipient.
- Then, please click Copy to copy the link or click Share to directly share it to the recipient's email address.
- Well, if it's finished. You can see the folder name for your request file.
So this article discusses how to use Dropbox. Hopefully this article can be useful and help you. Thank you


